If every dashboard in your analytical environment represents a room, you can see your complete environment as a house. Each room has a different purpose and hallways are used to connect the different rooms. By connecting the rooms you get a seamless experience.
Looking at your analytical environment you would like to achieve the same. Instead of having separate dashboards, they need to be connected. When users are working in a dashboard they need to be able to transition seamlessly from one dashboard to the other, while maintaining their context.
In the early QlikView days, developers will remember this as Document Chaining. It gives developers the possibility to link dashboards to each other and therefore give users a better analytical experience. They can switch between dashboards and therefore keep their selections and thus the context. This gives the feeling that the environment is connected.
Keeping hold of this context is necessary and that is why I’m showing you how Document Chaining for Qlik Sense works.
Let’s construct the base URL
The base URL consists out of multiple parts. The complete URL looks like this:
- https://{UrlServer}/sense/app/{AppID}/sheet/{SheetID}/select/{Dimension}/value1;value2
If we dissect the URL we get the following parts.
- https://{UrlServer}/
- This is the URL to your server. This is often the same for all users in your environment. Even if you have multiple nodes.
- sense/
- The parts defines where you are in Qlik Sense. It could be Sense, meaning you’re at the applications section. But it could also be Hub or the QMC.
- app/{AppID}/
- The app ID is the unique ID for the application.
- sheet/{SheetID}/
- The sheet ID is the unique ID for the sheet. Depending on which sheet you enter here, you will be directed to that specific sheet.
- select/{Dimension}/value1;value2
- The select is the part that eventually applies the selections in the application
In this current blog we will keep it at one simple environment where we have everything installed. There are exceptions for instance when the developers test at different servers, the presence of a certificate etc.
Note that the limit of the constructed URL cannot be longer than 2048 characters!
Getting the dimensional values
After we have constructed the base URL we need to collect the dimensional values. This can be done in several ways, depending on your solution.
First I will show a possibility when you only want to link dashboards on a single dimensional value. If you want to make a selections in a URL you will need to add /select/ to your URL. It will now look like this:
https://{UrlServer}/sense/app/{AppID}/sheet/{SheetID}/select/
When you have a one field, say for instance a Dim1name, you can enter this behind it:
https://{UrlServer}/sense/app/{AppID}/sheet/{SheetID}/select/Dim1/
Now what you need to do is get the selections. One possibility is to use concat(). A variable vSelections can be created to catch the outcome of the selections. You will need to add distinct in order to get only the unique values. Your code will look like this: Concat( Distinct( Dim1 ) , ‘;’). Add the second parameter of contact as the semicolon in order to separate the values correctly. Technically your URL will look like this:
https://{UrlServer}/sense/app/{AppID}/sheet/{SheetID}/select/Dim1/$(vSelections)
But once the variable is executed, you will see:
https://{UrlServer}/sense/app/{AppID}/sheet/{SheetID}/select/Dim1/value1;value2;value3
How does it look in the real world?
Examples are always more useful and that is why we’re showing how you can construct a working example. The steps to take are:
- Create two applications with the CTRL + 00 script in the data load editor. Load the data in both applications.

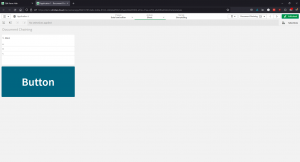
- In Application 1, create a filter pane for Dim1 and a button
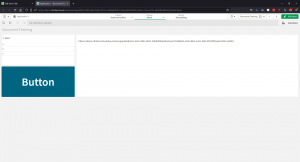
- Get the URL from Application 2 and construct the URL. Use a text object to see how it looks. My URL in this example is: https://demo.climber.cloud/dev/sense/app/60e8c4a7-6c26-49dc-9b67-93b82f5fa63b/sheet/573d6b64-e330-48c3-ad11-f601cf057f0f/
- Create the variable vSelections with: Concat( Distinct( Dim1 ) , ‘;’)
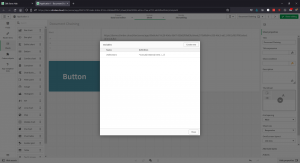
- Open the button and set the Navigation to ‘Open a website or email’ and enter the URL with the variable: =’https://demo.climber.cloud/dev/sense/app/60e8c4a7-6c26-49dc-9b67-93b82f5fa63b/sheet/573d6b64-e330-48c3-ad11-f601cf057f0f/select/Dim1/’ & ‘$(vSelections)’

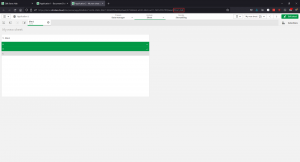
- Try it out and make a selection and press the button!

- Look at the addition of your variable marked in red
Now you have constructed your own document chaining!
If you want to have the possibility for all fields
You can also give users full access and the possibility for all selections. If a selection is not possible Qlik will tell you this. For the basis the same base URL is needed. The difference comes that you only have to add a different variable:
Set urlSelection = ‘Select/’ & GetCurrentSelections(‘/select/’,’/’,’;’)
https://{UrlServer}/sense/app/{AppID}/sheet/{SheetID}/$(urlSelection)
GetCurrentSelections is a great function and returns a list of the current selections in the app. As mentioned before it will let the users select everything. So if something is selected that is not present in the other application, the user will get the following message:
What could still go wrong?
There are multiple mistakes to make here:
- If you have made a spelling error like : Diim1 instead of Dim1
- If you have not used the right capitalization: dim1 instead of Dim1
- Fields are not concatenated correctly with ; as the separator
- The URL is longer than 2048 characters
Thank you Jordy